Make Perfect Pita Bread at Home – No Special Tools Needed!
Introduction
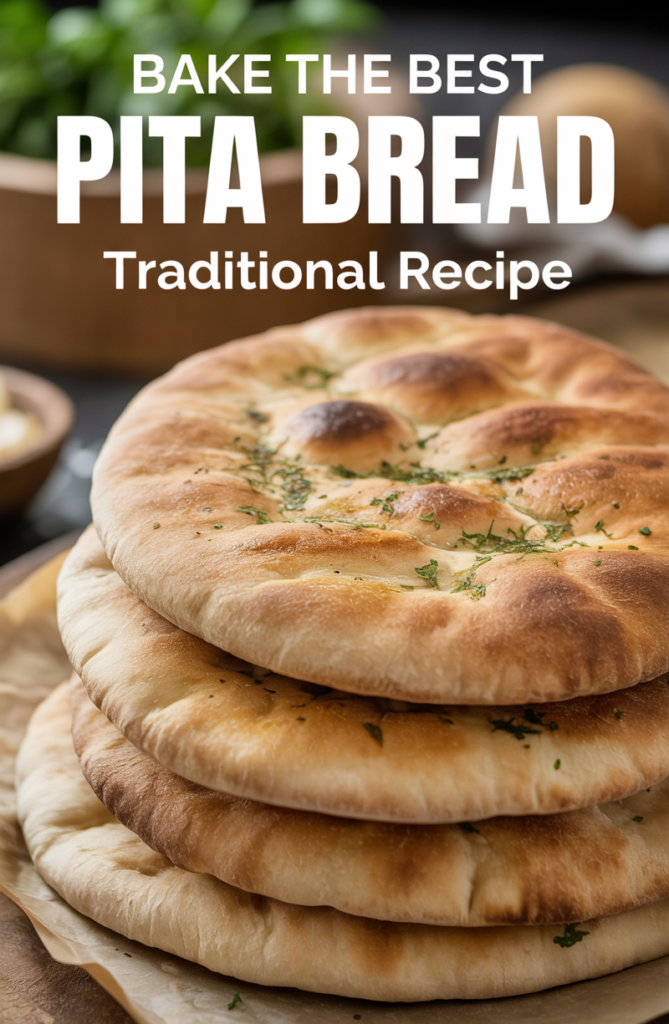
Fresh, pillowy pita bread straight from your own kitchen is a revelation—chewy, aromatic, and miles better than store-bought. The charm of homemade pita is in how effortlessly it puffs up in the oven, creating the iconic pocket ready for your favorite fillings. It’s an easy recipe that transforms everyday wraps, dips, and sandwiches into something truly special.
No fancy equipment or experience is required, making this beginner-friendly recipe ideal for anyone looking to add a homemade touch to their table.
Why This Pita Bread is a Must-Try
Homemade pita bread offers unbeatable freshness and pure flavor with basic pantry staples. It’s an endlessly versatile flatbread—perfect for scooping up hummus, wrapping grilled vegetables, or crafting quick gyros. Thanks to a simple dough and just a brief bake, pita is ready in under two hours, making it easy to fit into your schedule.
The result? Soft, warm pockets that separate beautifully, adding a wow factor to lunchboxes or dinner spreads.
Mixing and Preparing Your Pita Dough
Begin by combining flour, yeast, water, a touch of sugar, olive oil, and salt. Use a large bowl for mixing and knead until smooth—if working on a countertop, a set of Bamboo Cutting Boards for Kitchen, Set of 3 keeps dough off sticky surfaces and makes cleanup a breeze.
Allow the dough to rise until doubled in size for that signature puff. For precision, you can weigh your ingredients using the Etekcity Food Kitchen Scale, Digital Grams and Ounces, Medium, 304 Stainless Steel, ensuring perfect results every time.
Shaping and Baking Your Pitas
Divide the dough into equal balls and roll each into a disc about 1/4-inch thick. If you need an even, nonstick surface to roll out your dough, place a length of Reynolds Kitchens Brown Parchment Paper Roll, 45 Square Feet on your workspace. This not only prevents sticking but also helps in easy transfer to the oven.
Bake on a preheated sheet or skillet for just a few minutes. For even, golden results, opt for a reliable pan like the SENSARTE Nonstick Frying Pan Skillet, 9.5 Inch, which ensures a crisp exterior and soft, airy interior. The pita will begin to puff and form its signature pocket—magic you can witness in your own kitchen.
Serving Suggestions for Homemade Pita Bread
Enjoy your warm pita right from the oven, or let them cool and store for wraps or to pair with your favorite dips. For work or lunch on-the-go, pack your pita wraps in a Bentgo Salad Container – 54 oz Bowl, Khaki Green to keep them fresh and mess-free. Homemade pita even freezes beautifully, so you can enjoy fresh bread any day of the week.
Nutritional Information and Serving Size
This recipe yields about 8 medium pita breads. Each piece contains approximately 160 calories, offering carbs for energy and just enough fat from the olive oil for tenderness. Pita bread is a wholesome addition that pairs well with nutrient-rich fillings.
Recap: The Joy of Homemade Pita Bread
Making pita bread at home is easy and rewarding, thanks to simple ingredients and a no-fuss method. Whether for sandwiches, scooping dips, or eating straight out of the oven, this foolproof pita bread will become a staple—and you don’t need any special bakery tools to nail it.
Ingredients
Instructions
- In a large bowl, whisk together the flour, yeast, and sugar. Add the warm water, olive oil, and salt. Stir until a dough forms, then knead in the bowl or on a floured Bamboo Cutting Board for 8–10 minutes until smooth and elastic.
- Place the dough in a lightly oiled bowl, cover, and let rise until doubled in size (about 1 hour), ideally in a draft-free spot.
- Punch down the dough gently and divide it into 8 equal pieces. Shape each into a ball. On a sheet of Reynolds Kitchens Brown Parchment Paper, roll each ball into a 1/4-inch-thick round (about 6 inches in diameter).
- Preheat your oven to 475°F. If using a skillet, heat a SENSARTE Nonstick Frying Pan over medium-high. Bake or cook each pita for 2-3 minutes per side until puffed and lightly golden.
- Transfer cooked pitas to a clean kitchen towel and cover to keep warm and soft. Enjoy immediately, or store cooled pitas in an airtight container for up to 3 days.
Cook and Prep Times
Prep Time: 20 minutes
Rising Time: 1 hour
Cook Time: 15 minutes
Total Time: 1 hour 35 minutes
Enjoy effortless fresh pita—and elevate mealtimes with every soft, pillowy bite!