No Bake Protein Balls: The One Snack You’ll Crave Every Single Day
Introduction
If you’re searching for an easy, flavorful, and nutritious snack that truly satisfies, look no further than No Bake Protein Balls. These bite-sized powerhouses offer a perfect combination of energy, taste, and convenience—making them the snack you’ll crave every single day. Whether you need a quick breakfast boost, a midday pick-me-up, or a post-workout refuel, they deliver sustained energy with a deliciously chewy texture.
Why No Bake Protein Balls Are Your Go-To Snack
No Bake Protein Balls stand out thanks to their minimal prep, no-cook simplicity, and customizable flavors. Packed with protein, healthy fats, and fiber, they curb hunger between meals and help maintain your energy. Plus, their naturally sweet, nutty flavor profile—with hints of chocolate or dried fruit—makes them a perpetual crowd-pleaser for both kids and adults.
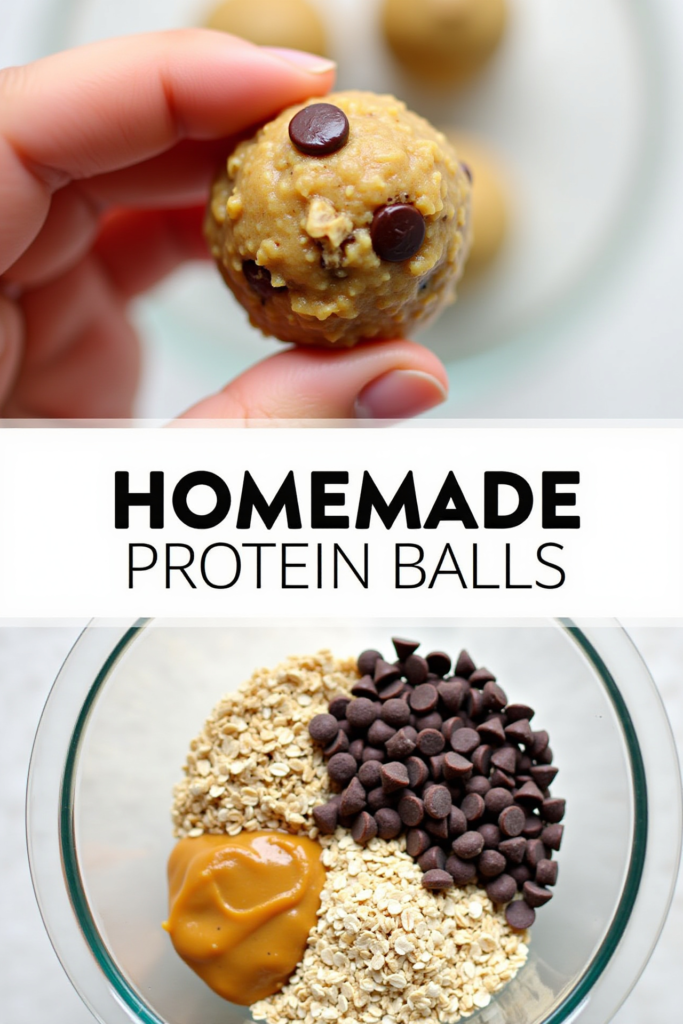
How to Make the Perfect No Bake Protein Balls
Begin by choosing your favorite high-quality protein powder—vanilla, chocolate, or unflavored all work great. Mixing in nut butter (like peanut or almond), hearty oats, a touch of honey or maple syrup, and add-ins like dark chocolate chips or dried cranberries ensures the balls stick together while remaining soft and chewy. Simply stir well, roll into balls, and chill for an hour to set.
Assembling and Storing Your Protein Balls
After mixing, use a small cookie scoop or tablespoon to portion out the mixture. Roll each portion between your palms to form even balls. Store them in an airtight container in the fridge for up to one week, or freeze for longer shelf life. This recipe is easily doubled or tripled, making meal prepping snacks a breeze.
Serving Suggestions for No Bake Protein Balls
Serve these protein balls straight from the fridge for an on-the-go snack, or pack them in lunchboxes for school and work. For a breakfast variation, roll them in shredded coconut, chia seeds, or even cocoa powder for extra flavor and texture. They pair perfectly with a cup of coffee or a fresh smoothie for a balanced quick meal.
Nutritional Information and Serving Size
This recipe makes approximately 16 protein balls. Each ball contains roughly 80-100 calories, 3-5g protein, and a balanced dose of healthy fats and fiber—ideal for supporting an active lifestyle and keeping you full between meals.
No Bake Protein Balls: The Snack Worth Repeating (Recap)
Easy, customizable, and packed with nutrition, No Bake Protein Balls live up to their reputation as the snack you’ll crave every single day. Their wholesome ingredients and no-fuss preparation make them a timeless addition to your healthy eating routine.
Ingredients
💡Meal Planning Tip: Save this recipe to automatically generate an efficient, store-section-sorted shopping list. It’s perfect for planning a week of healthy snacks and keeping your kitchen stocked with everything you need.

Instructions
- In a large bowl, combine the oats, protein powder, chocolate chips or dried cranberries (if using), and a pinch of salt.
- Add the peanut butter, honey (or maple syrup), and vanilla extract. Stir until everything is thoroughly combined and the mixture is thick but sticky.
- Using a tablespoon or mini cookie scoop, portion out the dough and roll each into a compact ball between your palms.
- Place the protein balls on a parchment-lined baking sheet or plate.
- Chill in the refrigerator for at least 1 hour to set. Store in an airtight container in the fridge for up to 1 week, or freeze for up to 2 months.
Weekly Meal Planning
No Bake Protein Balls are a fantastic snack to prep ahead for the week. Save and schedule this recipe to your meal plan and automatically generate consolidated shopping lists for all your weekly meals and snacks.
Planning Benefits:
- Combines ingredient totals across your planned recipes for efficient shopping
- Separates shopping lists by grocery store sections
- Reduces ingredient waste and duplicate purchases
- Keeps your weekly meal prep routine smooth and stress-free
Pro tip: Schedule your recipes for the week to see ingredient overlap and get precise quantities, so you’ll always have the right amount of essentials—like oats and nut butter—on hand.
Cook and Prep Times
Prep Time: 10 minutes
Chill Time: 1 hour
Total Time: 1 hour 10 minutes